Showing posts with label Thrift Shop Find. Show all posts

Monday, February 24, 2014

Both Functional And Beautiful

I've been thinking so much about kitchens lately--specifically that, of all of the rooms in a home, it's the one that must be equal parts function and beauty. When you love to cook you begin to learn how to move around a kitchen, how to store things, what to keep within reach, what makes for a good design. A functional kitchen is such a big part of feeling comfortable cooking night in and night out. Interestingly, I ended up loving my dainty (a euphemism for minuscule) NYC kitchen because everything was so handy and close by. I could stand at the sink and take a tiny step right to reach the fridge, a tiny step left to get to the stove, reach straight up for spices and olive oil and all of my dishes. Having a shoebox of a kitchen was so much more efficient than you would think. It surprised me in the best possible way! 

My current kitchen isn't horribly un-functional but it isn't terrific. A lot of the material choices--white countertops, weird pinkish tile flooring, flat paint on the walls--are really hard to keep looking clean, which is a big part of function. Even if I scrub and scrub it's a difficult kitchen to make spotless. But I'm glad I've had this experience because it's taught me a lot about what I don't want my someday-kitchen to be like.

So, a functional kitchen is important. But beauty, at least for me, has just as big a role to play. A kitchen must feel good to be in. Pretty things should be displayed, and good natural light is a huge bonus. Art should hang in the kitchen, a soft, colorful rug should be on the floor. You should love your dishes and maybe have a few open shelves for showing off your favorite ones. 

I've slowly been growing my collection of what I think of as "beautiful kitchen things." A lot of them were wedding gifts, which we still don't have here with us but they're being moved out of storage very soon and we'll be reunited with everything when we relocate.* A lot of my own additions were found at thrift shops, or they were DIY projects, or hand-me-downs. (Examples: my vintage wire basket, DIY Cook's Illustrated art, these yellow and ivory dessert plates.) It makes me happy to fill my kitchen with eclectic, vintage, pretty things!

Anyway, at the estate sale I went to last week, I found a few more pieces to add to my "beautiful kitchen things" collection. 


This miniature copper and brass footed colander stole my heart the moment I saw it (in all of its grimy glory). I knew it just needed a good cleaning to look its best again, and I'm all about a nice aged patina anyway. I can imagine it sitting on a shelf next to bright white dishes and using it to rinse strawberries. It's adorable, right?

And I couldn't resist these pink glasses. I passed them by on my first round but came back because I kept thinking about them. I've been so attracted to colored glass lately. You better believe that come summertime, my first batch of iced tea will be served up in these beauties. I only wish I had four!

I'd love to hear from you--how do you keep your kitchen both functional and beautiful? What does your dream kitchen look like? What sorts of things fill your shelves?


*I hope to share more news on that soon! It's been killing me to keep such exciting news bottled up inside!

Friday, February 21, 2014

I'm Headed To An Estate Sale!


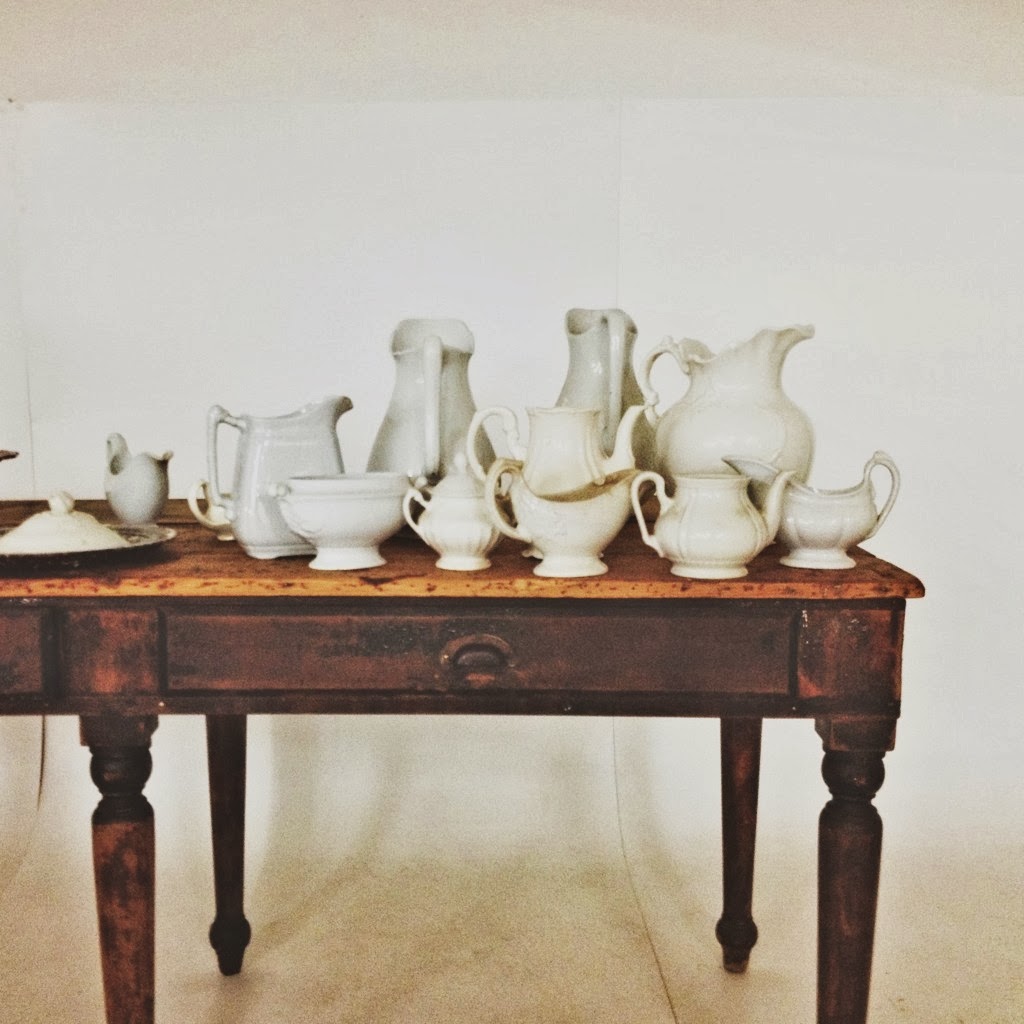
The first one I've ever been to! I know they can be hit or miss but I'm hopeful. I saw some photographs online of a few of the pieces that will be for sale and I have my eye on some brass dancing ladies. I'm also keeping a look out for ironstone and vintage dressers.

Here's to bargain hunting and secondhand beauties!


Friday, October 25, 2013

Useful Or Beautiful


I've realized something about the kind of thrift/consignment/antique shops I love most for finding interesting, inexpensive, one-of-a-kind pieces for my home. I've been to so many over the last few years--in New York, here in Alabama, in Washington, D.C.--and it can be easy to be swept into the shops that look the prettiest. The ones that have cute window displays and look more like a boutique than a secondhand store. And these places can certainly be terrific. In fact, for clothes and shoes and bags, these kinds of thrift stores are preferable. (If you ever need recommendations on places to find secondhand clothes in New York, ask me!)

But when it comes to thrift shopping for the home, the places I love the most--the ones that I've found hold the most buried treasure for the greatest value--are the ones that aren't so cute. The ones that are a little dusty and not so organized, the ones where you really have to look to find something worth buying. The kind where you come away with only one or two things but also the knowledge that you got the best that shop had to offer on that day. After sifting through the junk for an hour, it feels pretty great to be rewarded with a little gem.

I've found that this kind of thrift-shopping takes some patience and practice, however, so I thought I'd share a few little tips that I've picked up over time. I'm going to use this little silver-plated footed tray--which I recently got for less than five dollars in a highly disorganized and quite dusty shop--as my example.


First, you have to be able to picture it another context (in other words, imagine how it would look outside of the disorganized shop) and envision how you'll use it at home. I knew this footed tray would look perfect on my nightstand. It's the right size to hold a few little things, the feminine, glamorous style works well with my cut-glass antique lamp, and it has a unique shape that you don't often see. I also love the scalloped edging and the hammered metal look. It's just different and it's my taste and I knew it would be both beautiful and functional in our home.

Very often, you have to also use your imagination. This tray didn't need anything other than a good scrubbing, but more frequently my thrift finds need a paint job or some other big transformation to bring them to life. You should have a sense of how you'll be changing the piece to fit your style before you leave the store.

And finally, can the piece work in multiple settings? For now, I'm loving my little silver tray on my nightstand and think it's ideal for holding my wedding rings and my watch and some lip balm. But I may not always want it there and before buying something, I make sure it could work in a few different ways. I could easily use this in a bathroom to hold bobby pins or lipstick, on a dresser for my jewelry, or even on the edge of a sink for some fancy soaps.


One of the best aspects of thrift shopping, I think, is the imperfectness of it all. I love the patina on this tray, and I love that it's not exactly symmetrical (one corner is slightly bent). I love that you're so much more likely to find old things, handmade things, things that no one else in the world has but you.


Are you a thrift shopper? Do you think these tips are helpful? I'd love to know.


Monday, September 30, 2013

DIY Hanging Bird Mirror


For awhile now I've been eyeing this lovely hanging bird mirror. I love the vintage, industrial look of those chains, and the bird on top lends it the perfect touch of whimsy. I had no intention of ever buying it but last week I got to thinking that I could simply make my own, and for a fraction of the price! And I must say, in all of the DIY-ing I've done, this is one of the projects I'm most proud of.


I started out in the thrift shops in our little town and found this bird for the top. It was the perfect shape and I knew the details in it would come out when I spray painted it. It cost me next to nothing--I bought it and a silver-plated tray for five dollars total--and I was thrilled I'd had such luck in the first place I went. (My husband gave me the weirdest look when he saw it sitting on the table at home--I think he thought I had turned into an old lady overnight. I told him that he just had to trust my vision!)


As for the round mirror, I had zero luck finding one. So I re-worked my idea and decided that a long, thin rectangular frame would look really lovely, would be a cinch to find, and would probably give me less issues when it came time to attach the bird to the top. I found this frame for five dollars at a different thrift shop in town. It was exactly the shape I wanted and I didn't feel at all bad about throwing away that dog artwork--yikes!


This project was filled with a lot of trial and error, and my husband really helped me figure out the engineering details and the wall-hanging part. It wasn't the most stream-lined process, but here are the basics of what I did. 

I scrubbed and sanded the frame and thoroughly washed the porcelain bird. Then I glued the bird to the top of the frame and let it dry. I cleaned the glass in the frame and spray-painted the back of it with this fantastic Looking Glass Spray Paint (about 6-7 thin coats). This spray paint gives glass a faux-mirror finish, and it was ideal for this project because it created a clouded, antique-y looking mirror. There were also a few spots where the paint rubbed off a touch, and these imperfections really make it look old. I love that!

I then spray-painted the frame/bird, along with this brass chain I got at Lowe's, in Oil-Rubbed Bronze. I wanted the chain to look a little bit distressed and for the brass to come through in places, and my husband had the brilliant idea of rubbing it with some sand from the backyard to give it a naturally aged look. I think it looks perfectly worn.


My husband also helped me come up with the best way to hang the mirror from the chain. I was initially skeptical of his idea to put picture hangers (upside down) on the sides of the frame, but the idea really grew on me. I think the exposed hardware gives it an industrial look. I found these attractive, curvy ones at Lowe's, spray-painted them to match, and then we hammered them into the sides.


The final piece of engineering was to add the keychain to the top. Now, it not only more closely matches the original mirror I was mimicking but my husband assured me it would prevent the chain from snapping in a few weeks or months from the weight of the mirror. I just grabbed an extra ring from my set of keys and spray-painted it to match.


And here's one straight-on shot--obviously, I couldn't get this photo without including myself in it! It's no easy feat photographing a mirror, let me tell you.


I really loved working on this project all weekend and I'm thrilled with the results. These photos aren't the greatest but I must say that in person, it looks rather expensive and authentic!


What do you think? If any of you want to take on this project, let me know and I can offer you some more details and tips!


Wednesday, September 4, 2013

Thrift Shop Find: Ivory And Yellow Dessert Plates


My husband and I like to joke--now that it's over--about the first few months of our marriage, when I was finishing grad school in New York and he was finishing flight school in Alabama and we were living apart. At the time it wasn't a super fun situation but now it's kind of funny to look back on. We say things like, In this marriage we take things very slowly. We didn't even live together until six months after our wedding! (Is that funny to you? It is to us.)

Anyway, there's something else that falls into a similar category: almost all of our lovely wedding gifts and bridal shower gifts, and the beautiful hand-me-downs from my empty-nester parents are still in storage. Aside from a few things that I begged my mom to ship to me because I couldn't live without them (my food processor), everything is in boxes approximately 1,176 miles away. (Can you tell I miss them?)

Really, it's been okay and it has made sense to do it this way. We weren't sure how long we would be here in Alabama and my parents have been generous enough to store our things until we're ready for them and have a more settled situation. Plus, it's incredibly expensive to move things across the country, and it's not like we need those gorgeous tea sets and embroidered pillowcases and Stickley dining room chairs and Le Creuset baking dishes to survive. (I may have the opposite opinion, however, when I no longer have to be brave about the separation.)

Nevertheless, it will be so much fun to become acquainted with all of these lovely things when we finally move. In the meantime, I've had to be really careful about buying things here. I have sort of an inventory in my head of what we have packed away so that we don't end up with redundancies, and so I don't spend money on things we already have and don't really need.

Yesterday, I was doing a little thrift shopping and I spotted these adorable dessert plates. I love the modern stamped pattern and the textured ridges on the outer rim, and this mustard-yellow color is one of my absolute favorites. I did the mental check and remembered that in storage, we have a full set of Crate and Barrel white dishes as well as my grandmother's fancy English china, but nothing really in between. I decided these would be perfect dessert dishes for times when we want something a little more special than our everyday dishes but would rather not break out the china. 

So I brought home ten precious ivory and yellow dessert plates for a grand total of five dollars. And I'm feeling quite proud of them.


And they're even prettier in person!


Wednesday, August 14, 2013

Thrift Shop Find: Vintage Wire Basket


Recently, we've been saving lots of glass jars that once held jam or jelly, spices and sauces. I've found that they're perfect for storing pantry items like sesame seeds, chocolate chips, flax seed, and shredded coconut, and recycling old jars makes so much more sense than buying new mason jars. I love the way these foods look in glass and it's easy to spot each item when they're crowded together on the shelves. Glass jars are also ideal for storing leftovers in the fridge. It's quite a bit easier to see through glass than tupperware, so we're less likely to accidentally let something go bad because we couldn't see it very well!

Because glass is breakable, I needed to find a way to store these jars in a place that was accessible but safe. Until now they were crowded in with the tupperware on a lower shelf and it was just an accident waiting to happen. And our jar collection was really growing, so it was time to figure out a solution.

I decided they would look really neat in some kind of a wire basket on top of the fridge. I was so thrilled to come across this fantastic vintage gym locker in a consignment shop in Serenbe, Georiga this weekend. I was hoping to find something with a worn-in, sturdy look to it, instead of buying a shiny new wire basket (which tend to look sort of cheap). This basket is just perfect and I love the number plate on the front too!


I love the way the industrial-looking basket looks against our beautiful, hand-carved wooden basket (a wedding gift from some Alaskan friends of ours). Rustic mixed with vintage is always a great combination!


What do you think? Do you save and use glass jars? I think they're perfect for gifts too. A little spray paint or fabric on the tops would go a long way in making them extra adorable and gift-worthy!


Tuesday, July 30, 2013

Antique Find: Iron Sconce

Last weekend, we gave in and purchased a fabulous antique that we've been eyeing for a few weeks. This sconce (is that the right word for it?) really had me swooning when I first spotted it in a local shop. I love everything about it. The fact that it's made of iron and reminds me of a medieval castle. The distressed gold leafing and the five beautiful little candle holders. The "Made in Spain" stamp on the back and the fact that it isn't perfectly symmetrical. The uniqueness of it.


As you can see, it's just resting on the floor for now. We don't plan to put it up in our current home but are envisioning it in our one-day dining room. For our wedding, my parents gave us a gorgeous dining room table, chairs, and sideboard (not matching, but perfectly complementary--just the way we like it!) which are in storage right now until we have the space for them. Our dining room furniture is a perfect blend of traditional and modern and I think our new sconce is too. In some ways it's quite ancient looking (like I said--it belongs in a medieval castle) but I think the iron and the distressed gold lend it a modern and almost industrial touch. 


We can't wait to see it in action in our dining room someday. It was just too good not to snatch up, even though we won't be using it for awhile. I'm imagining crisp white candles burning in its holders (we will definitely be using this to actually burn our candles!) as we entertain family and friends around a table brimming with good food and laughter.


Tuesday, March 12, 2013

DIY Vintage Window Frame Makeover

I started working on a fun and unique way to display our one-year anniversary cards, which I've written about before. I really wanted to frame them but that seemed a little bit too boring and predictable, and it was also proving to be difficult to find a large enough frame that was in my budget. 

I had remembered seeing a bunch of fantastic vintage windows in an antique shop nearby and suddenly I was feeling excited and inspired. The glass windowpanes are like mini frames, and I thought the vintage window would lend a cottage-y, whimsical look to the project. Here is the before picture of the window frame with the cards laid out on top (sorry it isn't great--I quickly snapped it with my iPhone and forgot to use my real camera). 


I decided to paint the frame a vintage gold (one of our wedding colors) to freshen it up. I also sprayed the hardware on top an oil-rubbed bronze. 


I love the way it turned out! However, I'm now at yet another impasse. I wanted to attach the notes to the back of the windowpanes so that they would, essentially, be framed and preserved under the glass. The problem is that I haven't yet found a way to do this. I bought glue dots, but they were very noticeable on the front of the cards. I bought a special glue online but when I tested it out, the dried glue was also quite visible. I thought about Mod Podge but I am afraid that they may cause our precious cards to wrinkle. I was hoping to go with a minimal approach to whatever adhesive I used and Mod Podge requires you to slather it on.

I'm still brainstorming but I'm not sure if I'll be able to solve this problem. I've actually been thinking lately that maybe it wasn't meant to be and that I should hang this window above my desk instead as a sort of bulletin board, attaching little post-its and notes to the panes (see the inspiration for this idea here). Sometimes you have to be flexible when it comes to DIY projects, adjusting your plans along the way. I do love this window and I put a fair amount of work into it, so I know it will be put to good use! 


Tuesday, February 26, 2013

Everyday Vases

I like to treat myself to the occasional bouquet of flowers from the supermarket. They brighten up the room and bring beauty into our daily lives. One thing I love to do is arrange these flowers in unexpected vessels--it's playful and fun, and makes the flowers look casual and natural in our home.


Today, I'll show you some ideas for arranging flowers in everyday containers, and I hope you will be inspired to think creatively the next time you can't resist bringing home some gorgeous blush spray roses from the market.


Would you try this? What else would make for a terrific everyday vase?


Wednesday, September 26, 2012

DIY Kitchen Chalkboard


Last weekend, I spent a few hours working on a project for our kitchen. I'd been wanting to make my own chalkboard to write notes or grocery lists on for awhile, and I learned that (with the right supplies), it's a very easy project.

First, I went to the thrift shop and found a $5 atrocity that looked like this:


It was the perfect thing to turn into a chalkboard because it was so inexpensive, the frame had a nice detail to it which came out when I painted it, it was the right size, and I didn't feel at all bad defiling it.

First, I took out the glass and the picture and gave the frame a good cleaning and then a few coats of ivory spray paint. I think I sprayed on 4 very thin coats. I let it fully dry for a few hours before moving it.

Painting the glass with chalkboard paint turned out to be a little bit tricky. I had read online that chalkboard paint does work with glass, but I have a few tips to make it easier for you if you decide to tackle a project like this. At first I tried using chalkboard spray paint, and I sprayed on a few coats, waiting a few minutes between each coat like it said, but after letting it dry for an hour or two it began coming off the glass as a powdery residue. I don't know if I did something wrong or not, but I would not recommend using the spray paint. My husband wouldn't recommend it either, if you're anything like me (failed craft projects make me cranky!).

So I went back to the store, where they graciously took back the spray paint and I bought the regular chalkboard paint and a foam brush. Now, neither of these paints say that they work on glass but the paint version definitely does.


I flipped over the failed first side of the glass, sprayed on a primer on the new side for extra security, and painted on 3 thin coats of the chalkboard paint, waiting several hours between each one. After my last coat I let it dry for 24 hours before using chalk on it. I also alternated which direction I painted for each coat--up-down, then left-right, then up-down again. I think this helps to prevent it from looking streaky.

Finally, I prepped the chalkboard by rubbing chalk all over it and then erasing. Supposedly this prevents the first thing you write on the chalkboard from becoming burned in. And that was it!


Designed by Jackie's Design Studio